Posts found under: emilys cakes Archives - Emily's Cakes

Halloween 2015

It has become rather a tradition at Emily’s Cakes that every year with every special occasion, be it Easter, Christmas or our favourite Halloween, our literary creativity comes out to play and we create and share a celebratory poem to set the tone.

Over the years our little table was famous for our Halloween antics. Now if you are from or you know anything about South Africa you’ll know that Halloween is not widely celebrated or known for that matter. So we received A LOT of attention over the years. And it was fabulous. Every year I dressed up in different awesome costumes and bowed and waved at cars. I scared a few people in the day as well. But it was all done with loving intent, for good fun and laughter as Halloween should always be taken.

More Halloween Clip Art Illustrations at http://www.ClipartOf.com

Halloween 2015….

​Witches far,
Witches near.
It so draws close,
That time of the Year.

Where the Magic is high,
And worlds collide.
If you’re not in disguise,
You ought to run and hide.

Monsters and Creatures,
Are all on the scene.
Get your spells ready,
For soon it’s Halloween.

Fellow witches
Weather you brave it alone,
Or you join a coven.

A Hint

We moderners have traded
Our cauldrons, for an oven.

A spell, a spell
So to Ghouls you disappear,
Be quite, pay attention
Lend me your ear…

Double Double Toil and Trouble.
Gas Burns and Pots Bubble.
Biscuits, Pastries and Delicious Cakes
In the Oven the magic bakes.
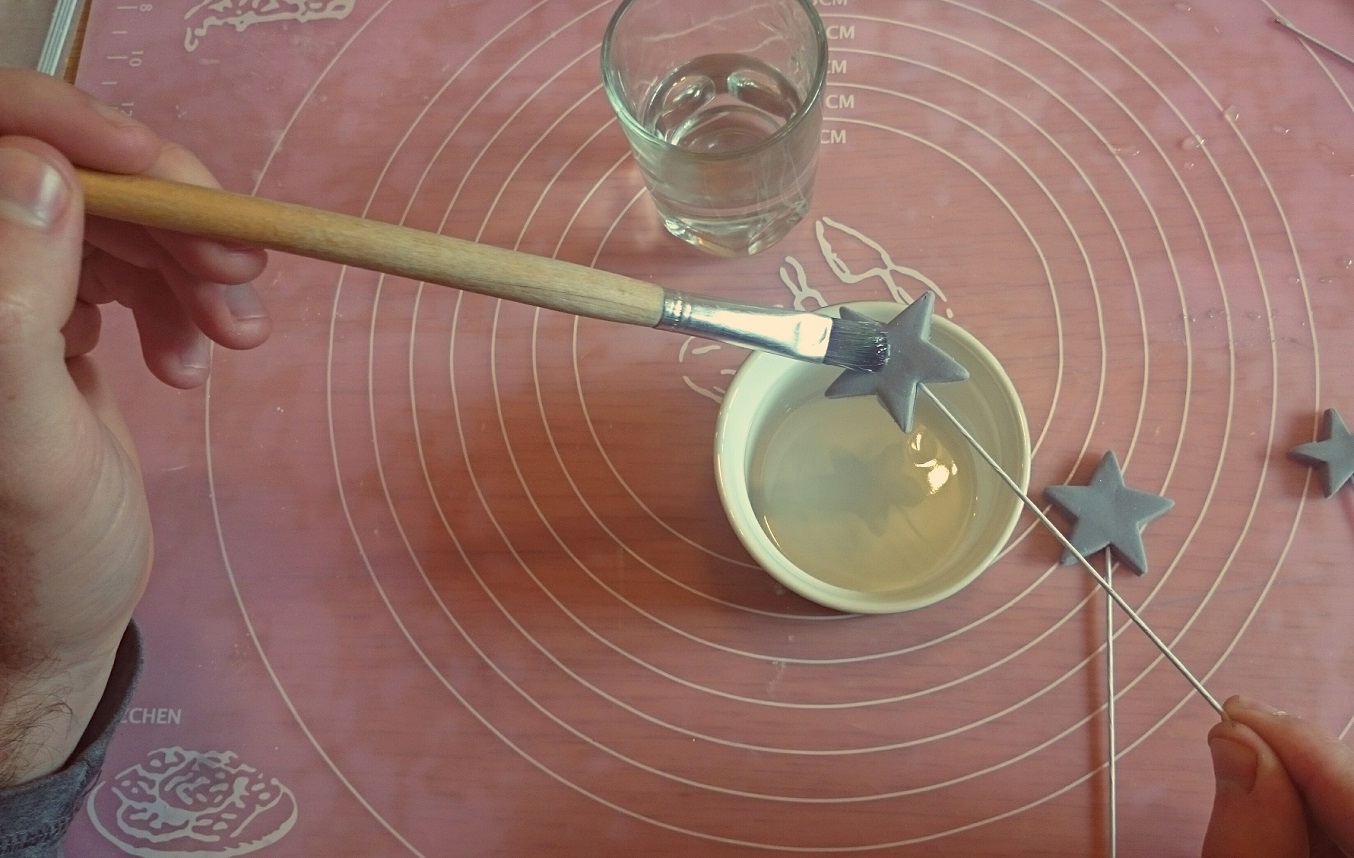
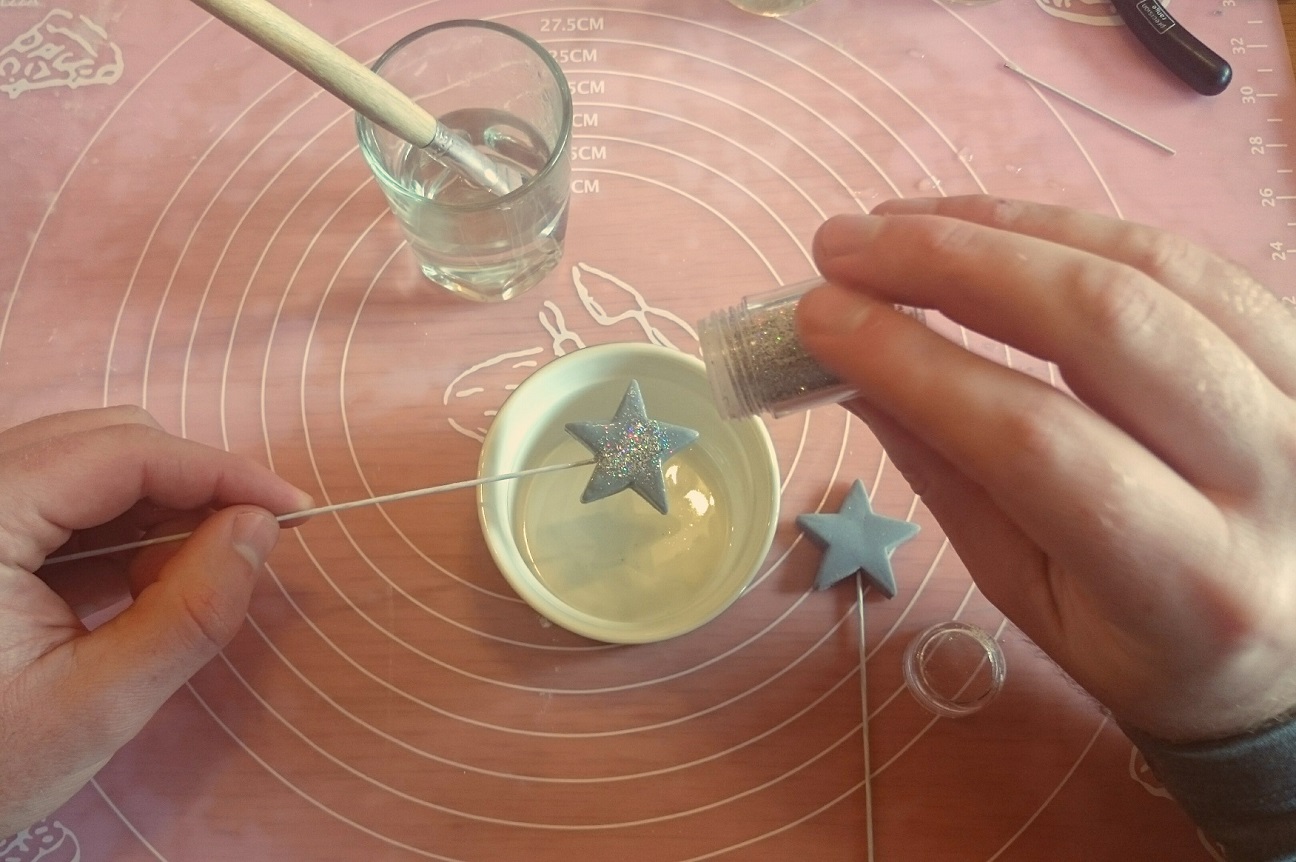
Fairy crystals
The first ingredient down,
Smuggled from the mystic Clover Town.

A dragon egg
Which are a bugger to crack.
Stolen from one fiery Mrs Draque.

Unicorn breath, for that vanillary taste.
A couple of beans( compliments of Jack)
Makes anything rise with haste.

Eye of newt and Mermaid scale
Add these two together.
And they make the batter.
Light as a Phoenix feather.


Once mixed it’s ready to go,
Pop it in the oven at 180 or so.

BOOOOOM CRASHHHHH……POOOOOFFF!!

Um…what did I do…?
Maybe it wasn’t one eye, but two.

Now look at this almighty mess!
Ok, so my best advice,
Rather leave it to the professionals.
They have that, how can I say…bakers finesse.

This year, I thought I’d have a go,
Now I’ll give it a rest.
No matter what I try,
Emily’s Cakes still does it the best.

Be reassured for Halloween
Their Cupcakes, Cakes Biscuits and Pastries
Will definitely keep you out of site.

For as everyone knows…

There’s Magic in every bite.

Toodles…
I’m off to get my order in,
Oh gosh the time
I better Run…

Because if you don’t order at least 3 days in Advance
Your order can’t be done..


We can’t stress enough how important
It is to pre-order any scary treat you want.
Please, you can’t go without
​If you want anything, just give us a Scream… or a shout. 

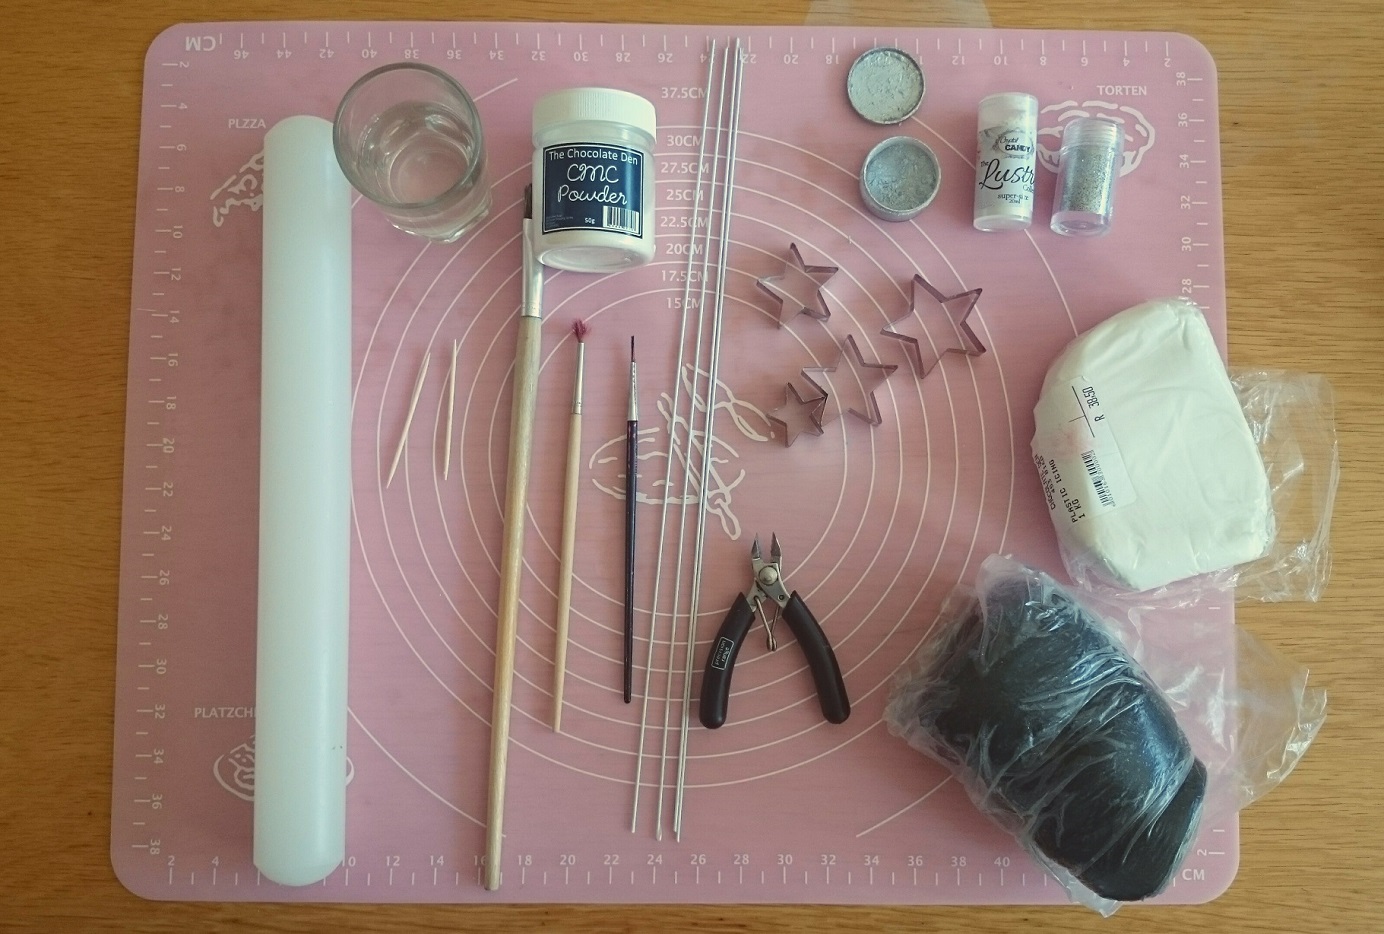
Here are our Halloween Memories and some Ideas for you.

White Plastic Ghosts.


Plastic Ghosts website sized
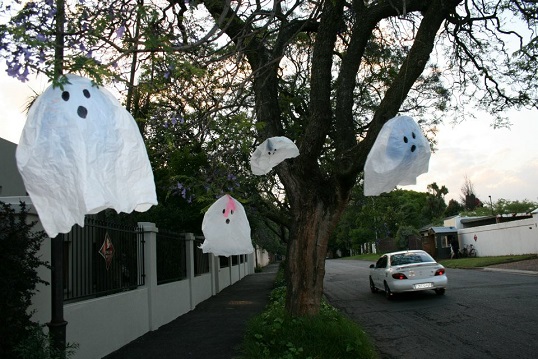
These are so easy to make and are so effective. All you need are white plastic bags, balloons,  some cotton & a needle, sticky tape and a permanent marker.
Cut handles off bags. Then turn them inside out and stick the corners down to get that round effect. Turn bag back inside out. Blow balloons up and tie them. Tie cotton to the balloon knot and use needle to thread the cotton through the top of the plastic. Once balloon is in plastic and secure, take permanent marker and draw on eyes and mouth for effect. Then all that’s left is to hang them in the most effective place. If you struggle just google it, there are plenty of tutorials on you tube.


Our Home Made grave. 

OUr grave
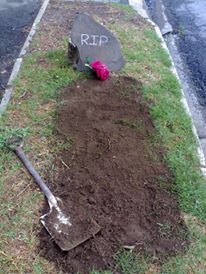
All you need is a Shapely rock, in this case it was slate. Chalk or Paint to write the R.I.P. Some loose soil, obviously you’ll need a wheelbarrow to transport it to where you want it. Some flowers and a spade for effect. The rest is self explanatory. 

Memories of The Scary Cup Cake Guy

For any information on the costumes or props we used please don’t be shy to comment or email us cakes.emilys@gmail.com. We’d be only happy to pass on some tips we learnt over the years.


ZOMBIE Adrian, ARRGGG!!!!

Zombie websized Zombie wounds

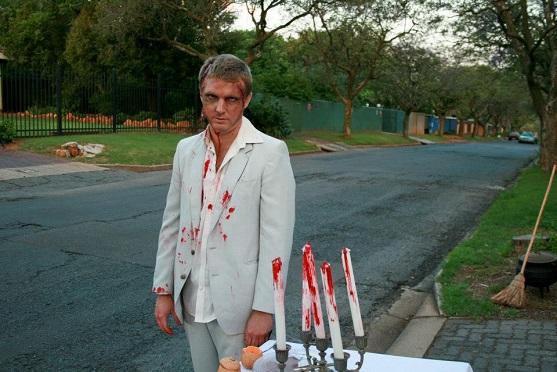
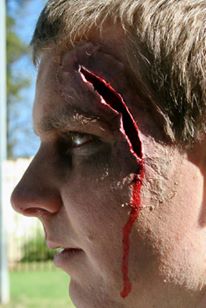
This costume was definitely the most realistic and if I may say so scariest costume I ever did. We literally had passers by running and screaming form me. People would stop some 50 meters away and cross the road. We nearly caused several accidents throughout the day. The Irony is that I was really sick that day, so really felt like death warmed up.

False wounds make any Zombie costume awesome. To make your own wound all you need is toilet paper, wood glue, a hairdryer, make-up and some fake blood. Pick your Tutorial Here Tutorials 

The basic premise is you stick layer of layer of toilet paper, with the wood glue. Drying it quickly with the hairdryer after each applied layer and then once you’ve created enough layers use a sharp knife to make and incision in the stacked layers of toilet paper. Then use make-up to blend the paper with your skin and add the blood colour inside. Use the fake blood and add to the wound for effect. See pic above.

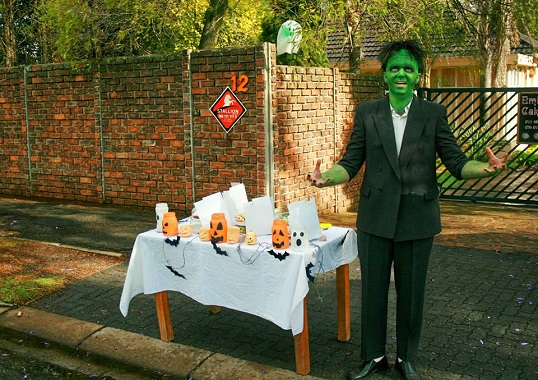
Count Dracula of Observatory 

Count Dracula COunt

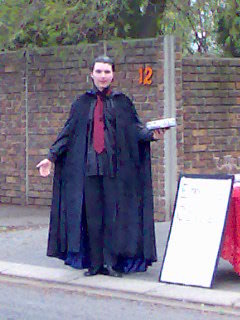
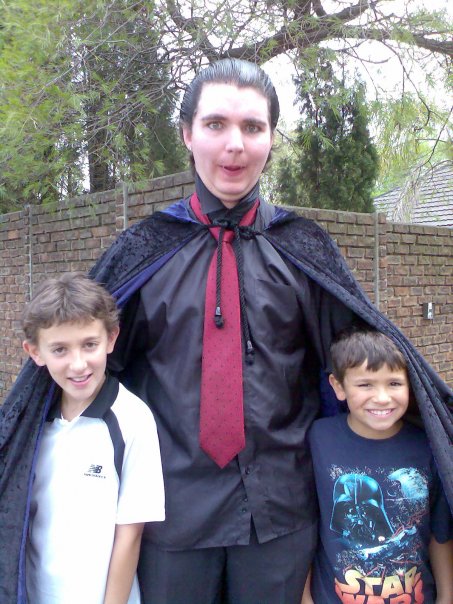
Probably the easiest costume. You’ll need baby powder and make-up, temporary hair die, if your hair is blonde like mine. Some fake fangs, a suit and a coat. I’m sure you can figure out how to assemble it all together, it’s rather straight forward.

Death!!!

Death

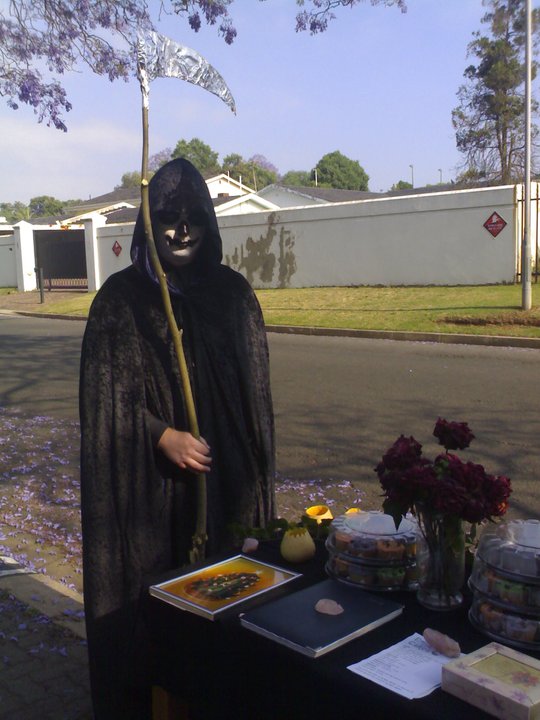
This costume caused sooooo much commotion. Tyres screeching, people gawking. It was a really fun character.

You’ll need face paints or make-up, a black full coat with hoodie is essential, dark underclothing and a scythe. We obviously made our own scythe using a long stick or thin tree branch, tinfoil/aluminum and cardboard. Cut the shape of the blade of the scythe out of card and then wrap it in the tinfoil. Finally secure the tin foiled card to the top of the stick. Simple and effective. Make-up wise, paint face using white face paint and black for the eye sockets, nose and teeth should do the job. Easiest way to get it right is get reference of any character and then give it a go and then have a blast, it’s supposed to be a mock anyhow. For our table we were fortunate to have dying roses and home made jack-lanterns.

The Mummy Rises Again.

Mummy of Obs

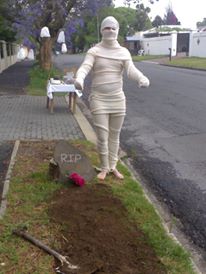
The Most uncomfortable to wear and most unflattering costume i ever wore. If you are going to attempt this uncomfortable mess let me warn you of a few things. It itches and it gets really hot and it’s rather tight and unflattering. And finally it’s rather hard to secure, so it keeps slipping down at the most inappropriate times. But besides those things, and that’s only my experience, it’s a great effective and relativity simple costume. All you’ll need is some mutton cloth. Don’t try real bandages because you will be broke by the end of Halloween. And no amount of candy is worth it. I chose to go all out authentic and only wore briefs underneath. But if you aren’t that serious wear a T-shirt and shorts. I used safety pins to secure the cloth, if you can use anything else go for it!

Frankenstein’s Monster 

Frankensteins Monster websized Frankenstein And Kaleesie resized Frankensteins Monster and Witch resized

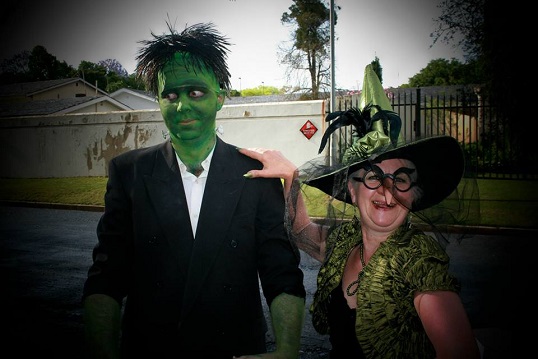
The most popular character I ever did. That year we had flocks of people all dressed up coming to take photos with the big green monster. Was such a hoot.
You’ll just need a lot of different green and brown face-paints and some make-up. A black crazy wig, a couple of handmade or bought bolts and oldish suit.
Using green cardboard you’ll get that huge forehead effect, there are some great tutorials online here Frankenstein’s Monster  
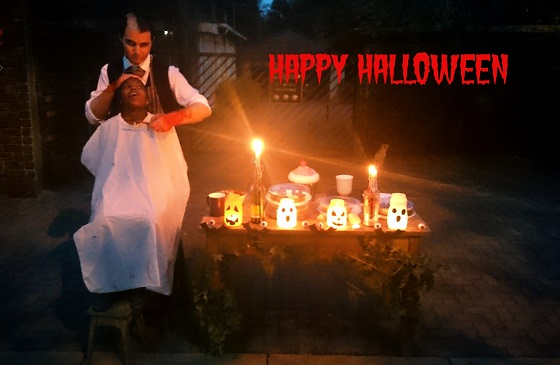
Sweety Todd 

Sweety Todd websized halloween3 websized

And finally our take on Sweeny Todd…Sweety Todd the Bloody Baker of Gerard street.
This was another simple, yet complicated costume. Most of the effect was in the make-up. So make sure you have a competent artist as I did. For authenticity, have a waistcoat,apron and cut-throat razor. For everything else hair etc just get reference, Johnny Depp’s portrayal is the best for reference.


Well I hope you’ve enjoyed our Halloween history and perhaps you even got some ideas for your next costume. Till the 31st fellow trick or theaters and lovers of fright , keep it Scary, Merry and Light.

Read more...

How To Make Fondant Stars | Top Tip Tuesday

How To Make Fondant Stars

Emily’s Cakes Top Tip Tuesday

‘Do you offer lessons?’ we’ve been asked and, ‘Please, Please teach me how to do what you guys do!’ we’ve been begged.
These two scenarios have become a regular occurrence since we started. So The Emily’s Cakes team mulled over it and for a while now we’ve been toying with the idea of offering comprehensive tutelage on our own YouTube channel to accommodate everyone, bringing all the knowledge we’ve gained over the many years to you.

But we’ve decided to start gently with a precursor to our upcoming videos.

Here is a picture instructional on how to make very popular, funky, fantastic gumpaste stars. They might look complicated but once you’ve acquired all the necessary tools they become quite simple and with so many finishing options you can add your own personal style to make them really stand out as your own.

Step 1: This is what you are going to need.

TO MAKE

Pop Out Stars (1)  Pop Out Stars (2)

Silicon Mat: Or if you don’t have one. Heavily dust, a very clean, surface with Icing Sugar.

Rolling Pin

Fondant: White and black (or just white and black gel colouring).

CMC (cellulose gum) Powder: A thickener for the Fondant, making it easier to work with and dry quicker. For stars this is necessary, especially if you are in a rush.

Star Cutters: You usually find them in packs of four or Pop Star Cutters: These will make life so much easier for you, if you can find the right sizes buy them quick.

Gauge Wire: They come either wrapped in florist tape or not. We’ve use wires wrapped in white florist tape,  you can use whichever  you prefer. They also come in different thicknesses. For these stars you will need size #18 to hold the stars’ weight.

Small set of Wire cutters: Or any you can find they don’t necessarily have to be the same as in picture.

TO DECORATE

A small glass of water

Paint brushes: Two or three different sizes, these must be food safe, in other words not used to paint anything else.

Silver Lustre Dust: We prefer to use Rolkem super silver.

Apple Cider Vinegar or Vodka

Steamer: Either from a kettle, tea pot or steamer machine, even a pot of simmering water on the stove, whatever you have available.

Silver Glitter, edible: Just ask at your local cake decorating suppliers.

Piping syringe: Or a piping bag filled with buttercream or royal icing and a number one or two nozzle, to pipe letters on the stars. You can also colour your icing or use several coloured icings


Let’s Get Started.


Getting The Right Colour Fondant

 Pop Out Stars (3) Pop Out Stars (4)


Take a small amount of the black fondant and place it into white fondant. Use about an eighth of the black to the white. Knead the two together until they are fully mixed and you have your light greyish/silver fondant.

If you are using the Gel, flatten out your white fondant and squeeze the gel into the middle. Fold the fondant over the gel and knead until the colour is achieved and there is no steaking.

NB: Be careful to only squeeze out a small drop as the gel is concentrated and you do not want a dark grey. If your colour is too light, you can always add more.


Thickening

 Pop Out Stars (6)


Take your mixed fondant lay it flat and make a well in the middle. Take the CMC powder and add a little, then fold the sides in, ensuring the CMC stays in the fondant. Use 5ml per 250g of fondant. If you are using less fondant, knead in small amounts of CMC till you feel the fondant thicken considerably.


Cutting The Gauge Wire:

 Pop Out Stars (7)


The length of the wire does depend of the size of the cake you are using. Just note that the wire has to be long enough to make sure the stars stand upright. If they are placed behind a cake topper, the wires should be long enough for the stars to be visible. Pictured, I’ve measured the wire with a ruler and cut it in half. I then use the cut half to measure the rest of the wires. But you can have different lengths, which will create a different effect with smaller stars as well.


Rolling Your Fondant

Pop Out Stars (9)  Pop Out Stars (10)

Take your ball of fondant and pat it flat. Take your rolling pin and start roll out your fondant evenly. If you rub your hand over it, you can usually feel if one side is larger than the other. It is important to make sure it is level otherwise the stars will not come lob sided and will look shoddy. The fondant should be approximately 4-5mm thick

Cutting Out Your Stars

Pop Out Stars (11) Pop Out Stars (12)

Place your star cutter on the fondant and push down firmly. You must push firmly to ensure it cuts a true shape. This is far easier with popper cutters. Remove the cutter and you star will be cut and stuck in your cutter.

Pop Out Stars (13) Pop Out Stars (14) Pop Out Stars (18)

Using a toothpick, slowly slide it down the inside star point of you cutter and gently push down on the fondant. Make sure the point of the toothpick is pressed against the side of the cutter so as not to prick the fondant. Do this to each point and the star will pop out. At this point you can decorate the stars as is if you intend to put them flat on your cake, or proceed to placing them on the wires.

Inserting Gauge Wire:

Pop Out Stars (15)  Pop Out Stars (16)

Place the star flat on the surface and, holding it down, insert the gauge wire between two star points, about half way through the star. Make sure the wire is as close to and parallel to your surface so it goes into the star as straight as possible. Place Completed stars on a tray or board and let them dry, usually overnight but no less than 3 hours.

Decorating:

 Silver:


  Pop Out Stars (22) Pop Out Stars (23)


Using a brush or teaspoon, place some silver dust place in a small container(I used an empty silver dust container) and add either Vodka or Apple Cider vinegar.

The consistency is something you’ll have to feel yourself and should be slightly runnier than a paste, pretty much like paint. It must be thick enough so the star is not seen through the paint but not to thick that the mixture clumps together and doesn’t spread.  Use a smaller paintbrush to paint. Make sure you’ve covered everything, these stars can be sneaky.


Glossy:

 Pop Out Stars (25) Pop Out Stars (26) Pop Out Stars (24)

You can either:

Stand by the kettle and whilst its boiling, rotate the star in the steam for a very short period.

For more than one star it is best to boil the kettle and pour the water into a Tea Pot.

Lift the lid off and with the resulting steam you can steam your stars. And again, rotate the star to get all sides shined.

And most importantly once that is done, get the cups, milk,sugar and add teabags to the pot! Can’t let the water go to waste can we.

Glittered:

 Pop Out Stars (27) Pop Out Stars (28) Pop Out Stars (34)

Use large brush dip in water and brush the star. The water will mix with the sugar in the fondant and create a sticky top layer. The brush should be lightly wet or the water will disolve the star.

Using the silver glitter shaker, tap on the side to evenly spread glitter over star, making sure all surfaces are covered.

Finishing Off:

Pop Out Stars (30)

Painted and glittered stars can be placed in a glass to dry for about an hour.


Pop Out Stars (31)  Pop Out Stars (32)

Once dried, you have the option of adding the personal touch of a name spelled out on the stars, or a special message. Use the syringe or piping bag and slowly and carefully pipe each letter as pictured. My advice is to practice a couple of times on a plate or board before you write on the star itself.


I hope this has helped you and we’d love to see your star creations. So post and share photos on Facebook, Twitter or Instagram and Tag or #emilyscakessa. Thank you and we’ll see you next week for our first video:

Simple cupcake icing techniques.


*For all your cake decorating requirements visit the following stores in and around central Johannesburg.*

The Chocolate Den

Pomanda

LIndas Pack and Bake 

Sugar Art Shop

Read more...
  • Contact Us

    Tel: +27 11 487 0575

    cakes.emilys@gmail.com

    Copyright © Emily's Cakes - All Rights Reserved

  • ×

    Welcome To Emily's Cakes

    If you'd like to order directly with us, chat to Emily below on WhatsApp or send us an email to: cakes.emilys@gmail.com

    ×